Adding a Client
From the Clients page, click the "Add Client" button
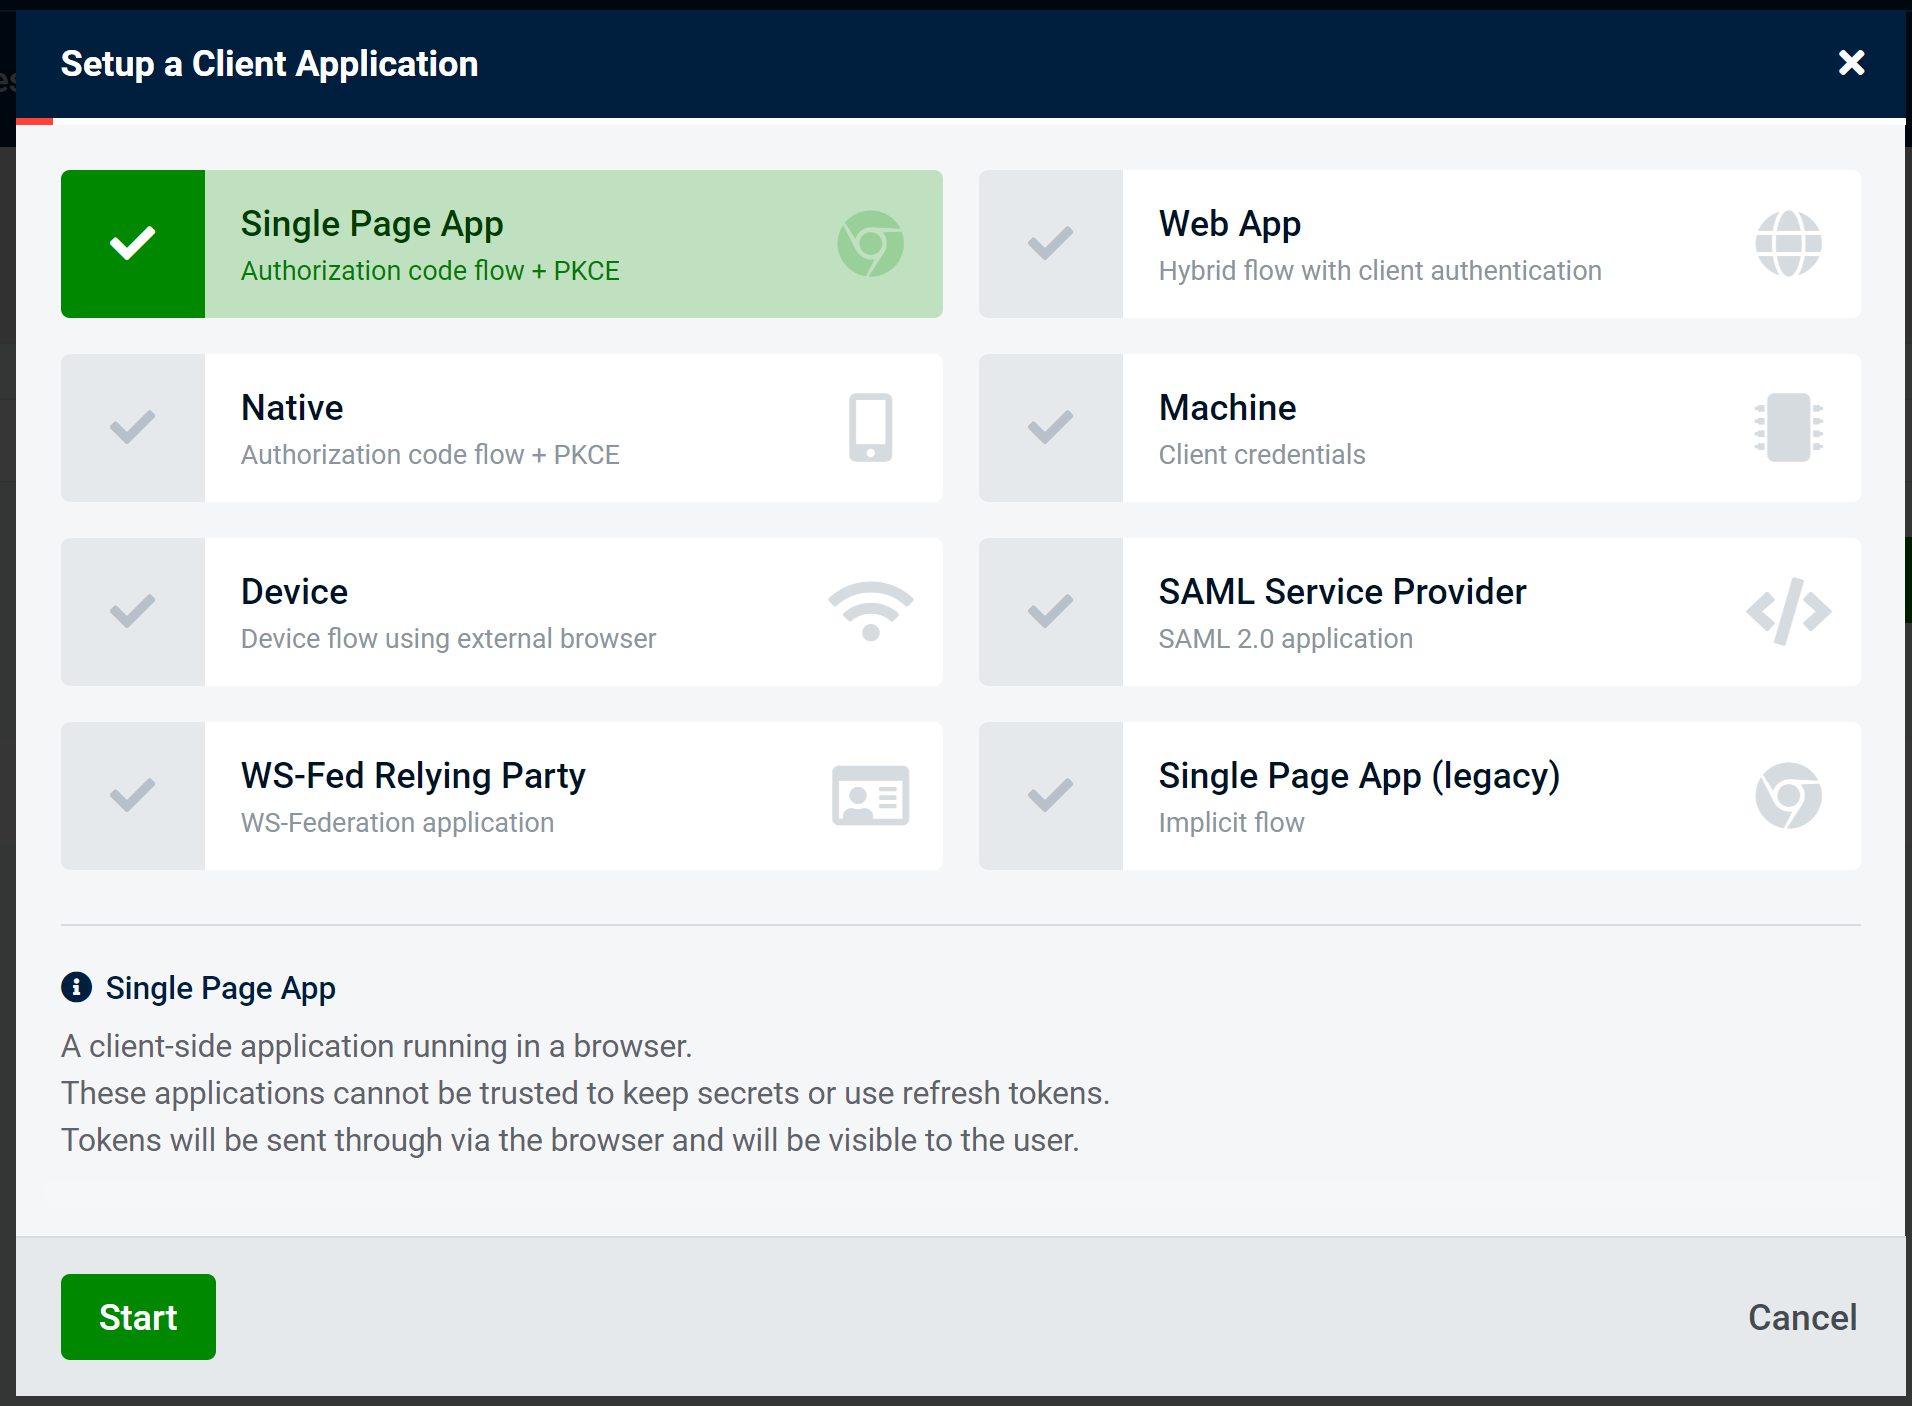
Client Type
Choose the client type you require from the 8 available options:
Single Page AppA client-side application running in a browser.Web AppA server-side application running on your infrastructure.NativeA desktop or mobile application running on a user's device.MachineA machine-to-machine method of communication.DeviceAn IoT application or otherwise browserless or input constrained device.SAML Service ProviderA SAML 2.0 service provider commonly used by government and educational institutions.WS-Fed Relying PartyA WS-Federation relying party commonly used by older Microsoft applications.Single Page App (legacy)A client-side application running in a browser using previous OAuth Working Group recommendations.
Proceed with the required Client and follow instructions for each client type.
For this example i will be setting up a Single Page application, many of these steps are relevant when setting up other client types.
After selecting the SPA options you will see a dialogue enabling you to add the following:
Client IDUnique identifierDisplay NameApplication name that will be seen on Consent ScreensDisplay URLApplication URL that will be seen on Consent ScreensLogo URLApplication Logo that will be seen on Consent Screens. Note - must be HTTPSDescriptionApplication description for use within AdminUIRequire ConsentSpecifies whether a consent screen is required for this client
Click next once all details have been filled in as required:

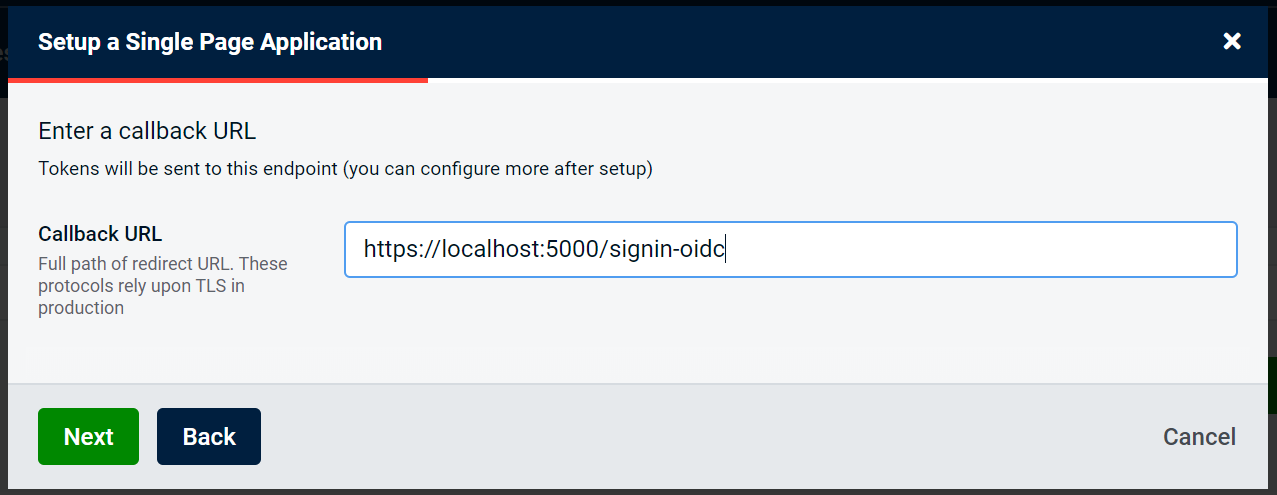
SPA Callback Url
You will be asked to enter a Callback URL, which is the endpoint where tokens will be sent to. This can be configured more after setup, and is the full path of the redirect URL. This must be over HTTPS:
SPA Logout Url
You will next be asked to enter a Post-Logout URL. This is optional and you can configure more after setup - it is where users can be returned to after logging out. This must be HTTPS:

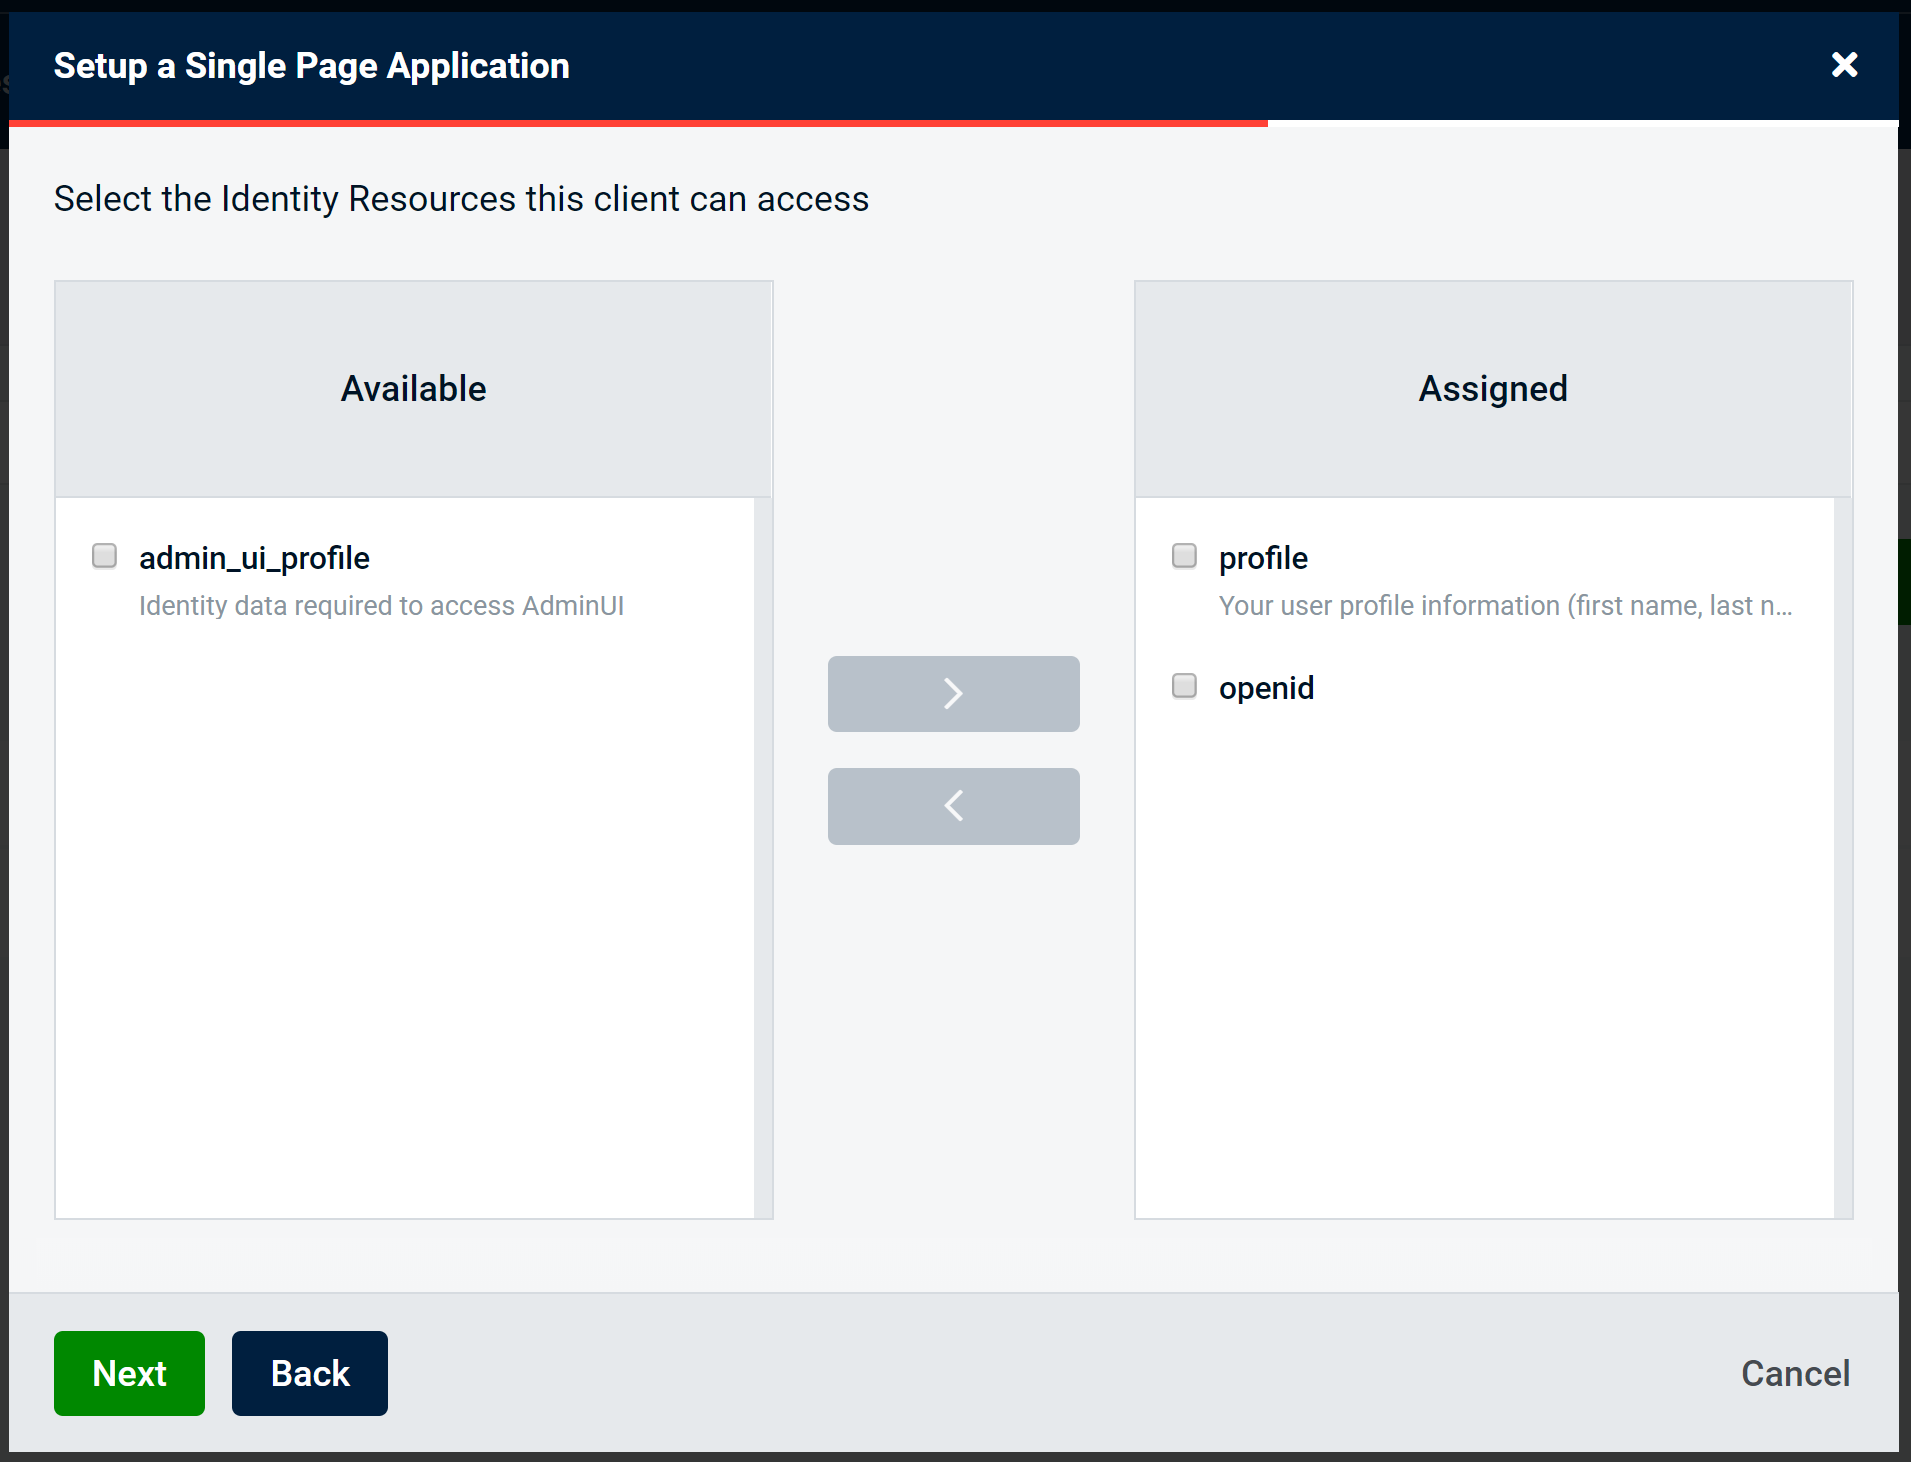
SPA Identity Resources
You will next be asked to select the Identity Resources that this client can access:
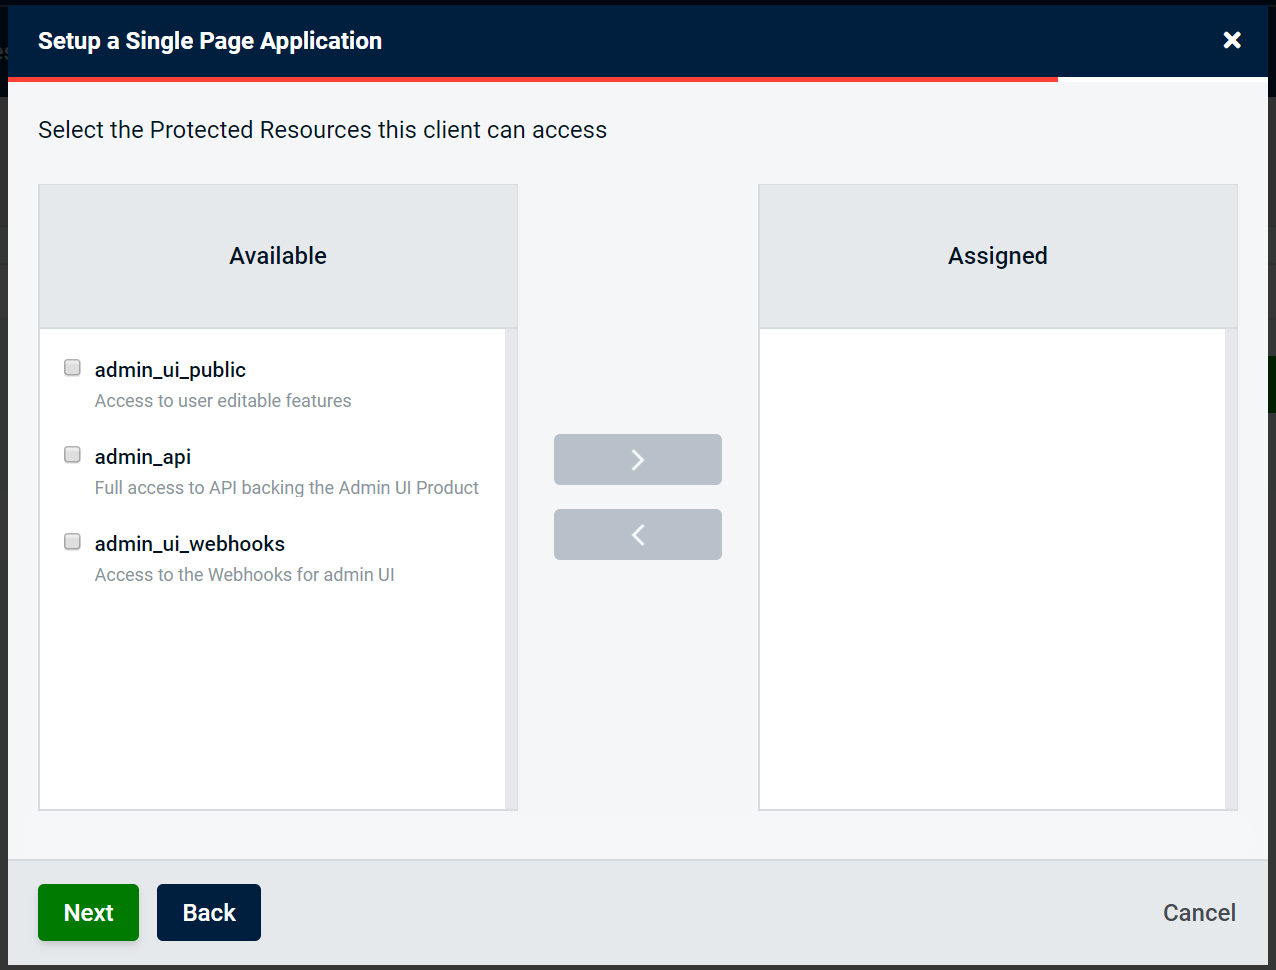
SPA Protected Resources
At this point, you can now choose the Protected Resources that this client can access:
SPA Details Review
You will get the chance to finally review all details at the end of the application process, when you will see a summary of all details entered so far.
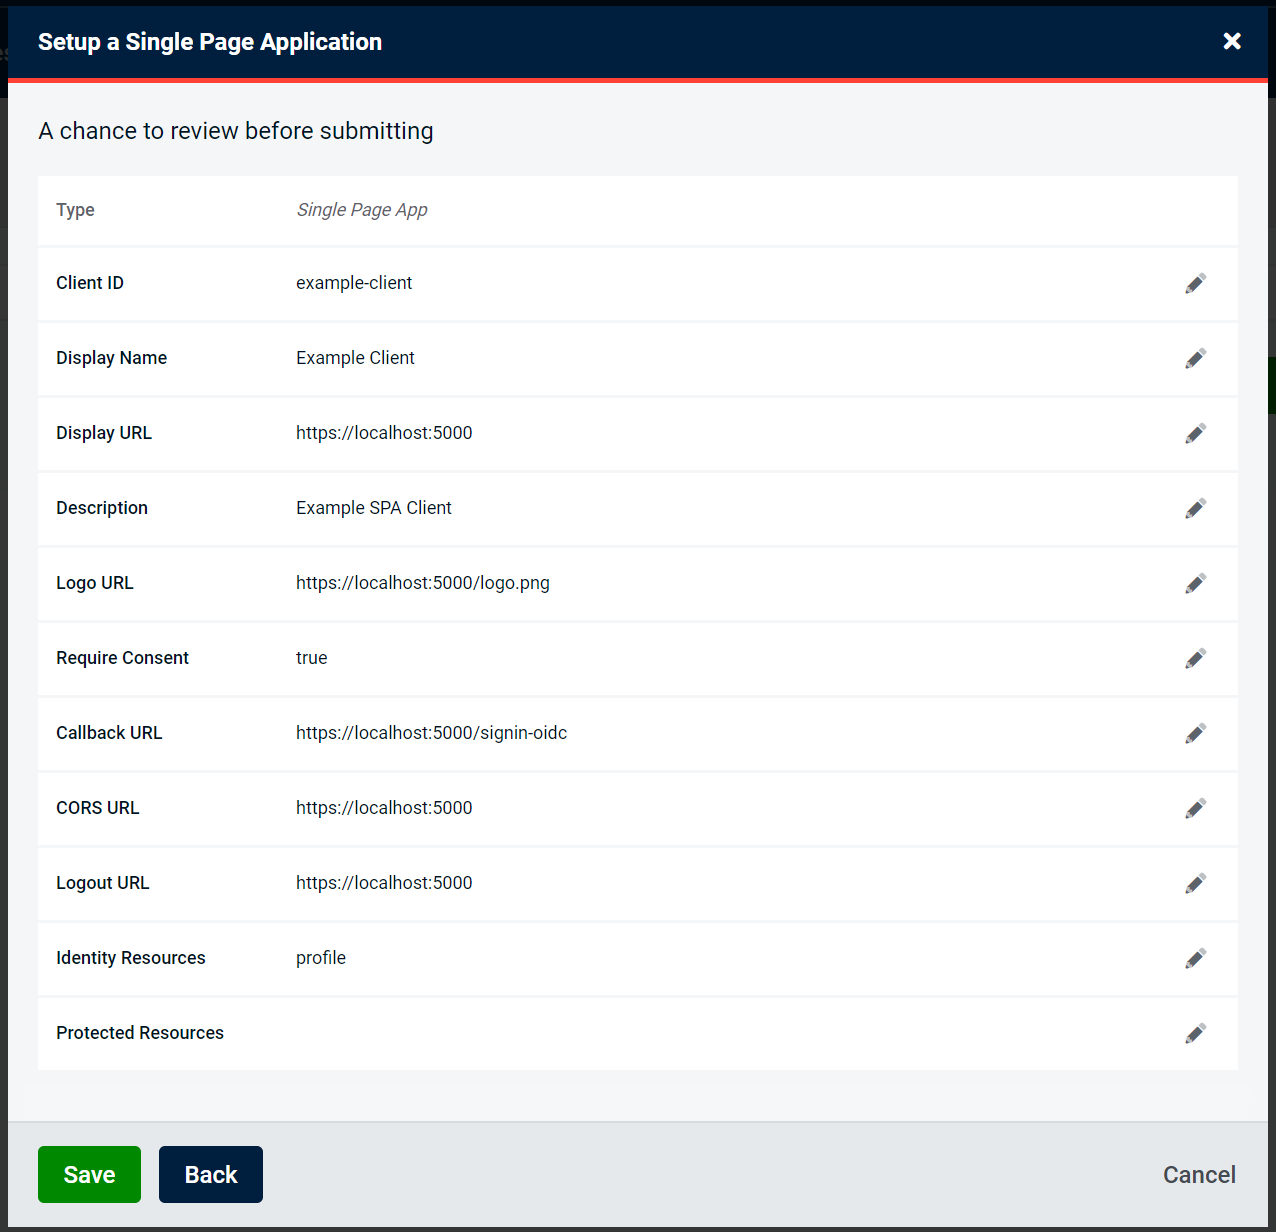
To edit, click the pencil icon and you will be returned to the page to amend those details. For instance, editing the Display Name will return you to the Basic Details
Back
If at any point after entering the basic details you wish to go back, you can navigate backwards and forwards within the application using the links at the foot of the modal, or cancel out of the entire process:

Success
Once clicking submit, you will have successfully added a SPA Client.
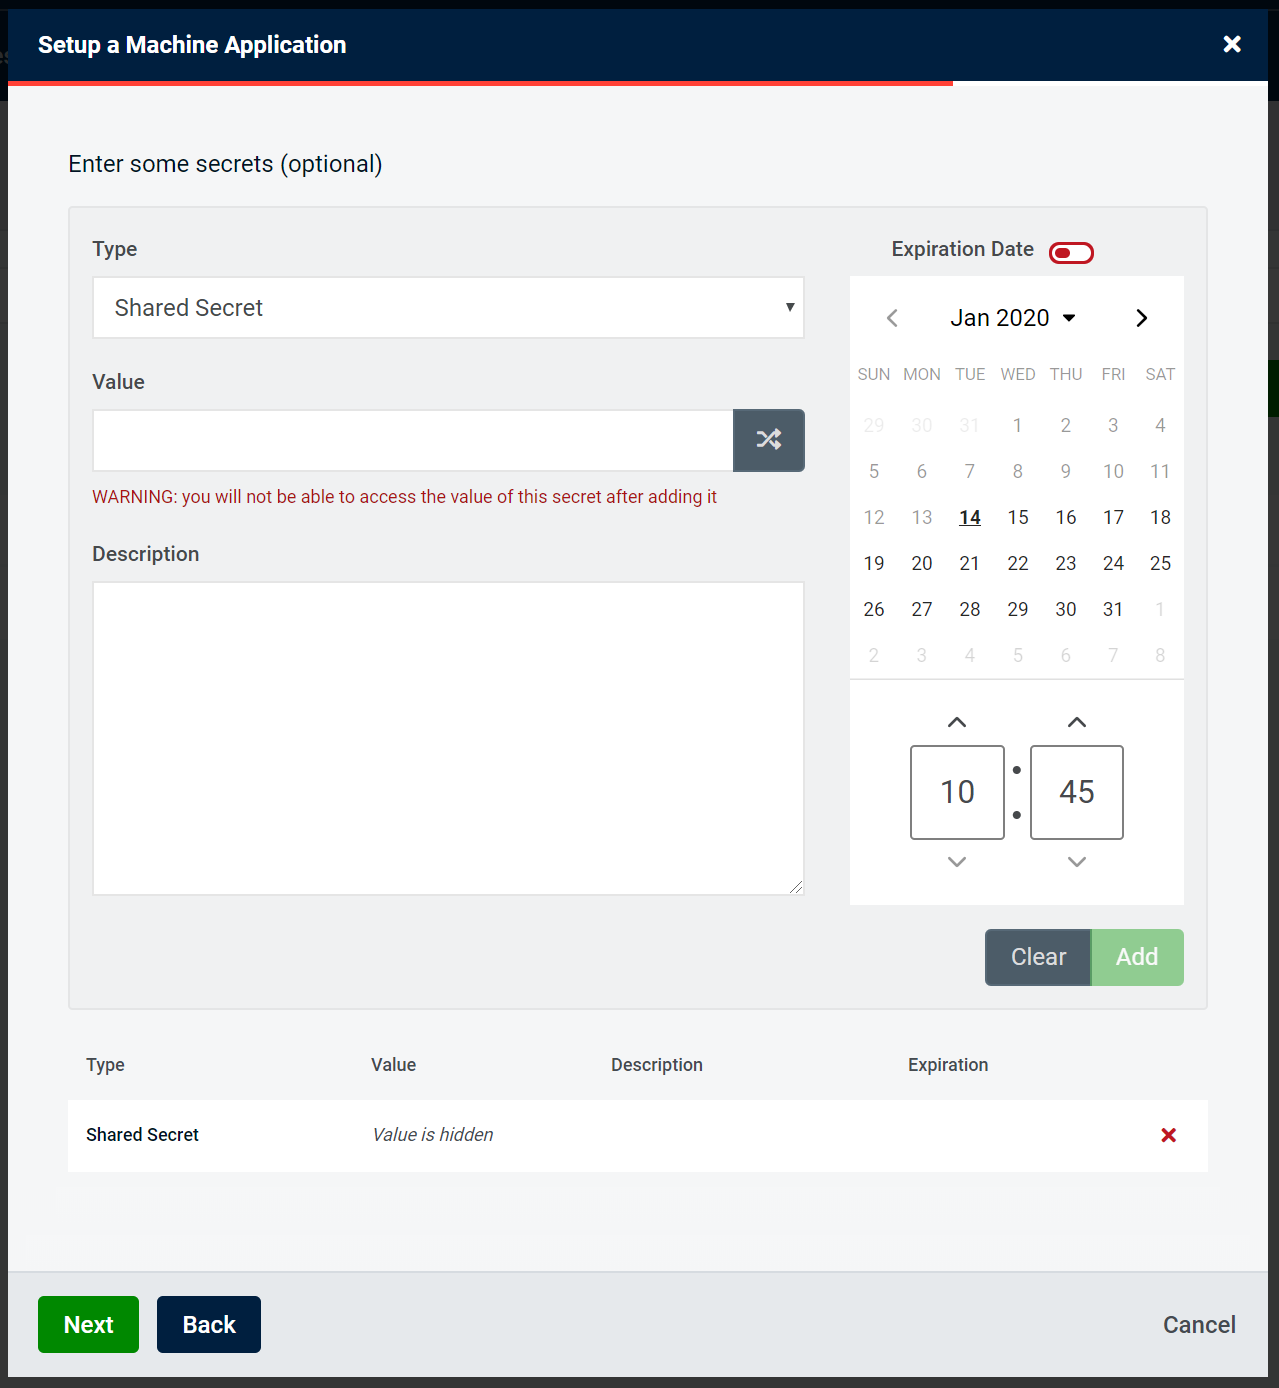
Secrets
For relevant clients, you will be asked to optionally add some secrets.
You can select a Secret Type of either a Shared Secret or an X509 Certificate Thumbprint.
Once you have filled out and entered the required Secret details, click "Add" and the Secret will be added to the client on creation